In the previous blog, we discussed how to sign up. Now, in this blog, we will learn how to set up your oidCard profile.
If you’re new, you can read our oidCard guide. Let’s get started!
oidCard Profile Setup Guide
Step 1: First, you need to log in to your account at oidcard.com.
Step 2: After logging in, you will see your dashboard. You’ll notice your profile name displayed in the corner.
For convenience, you can enable night mode by clicking the “moon” icon.
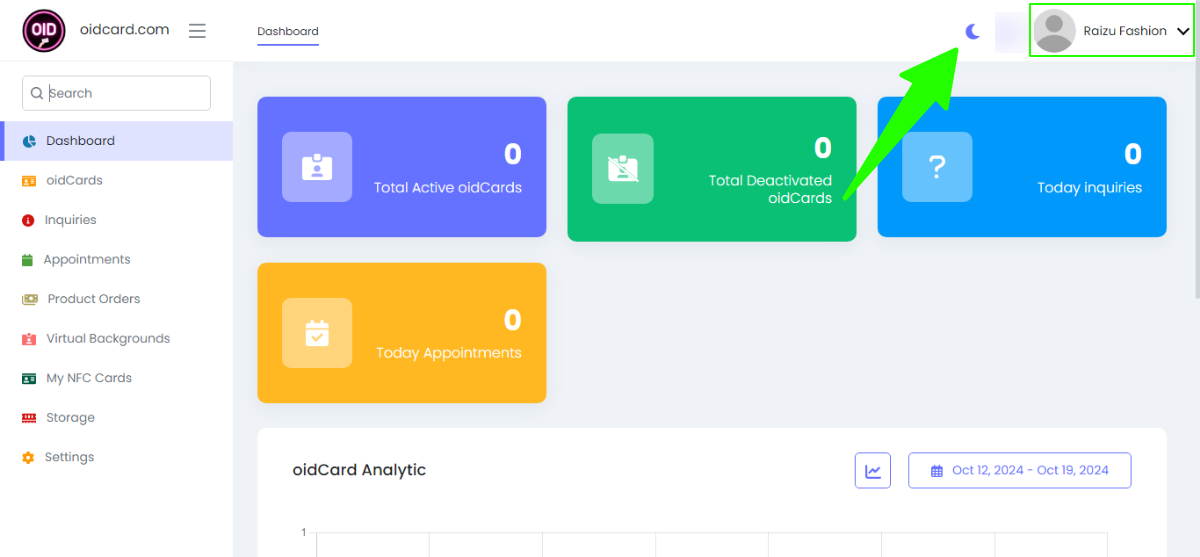
Once you enable night mode, your dashboard interface will look like this. If you don’t find night mode comfortable, you can switch back to “sun” mode by clicking the sun icon.
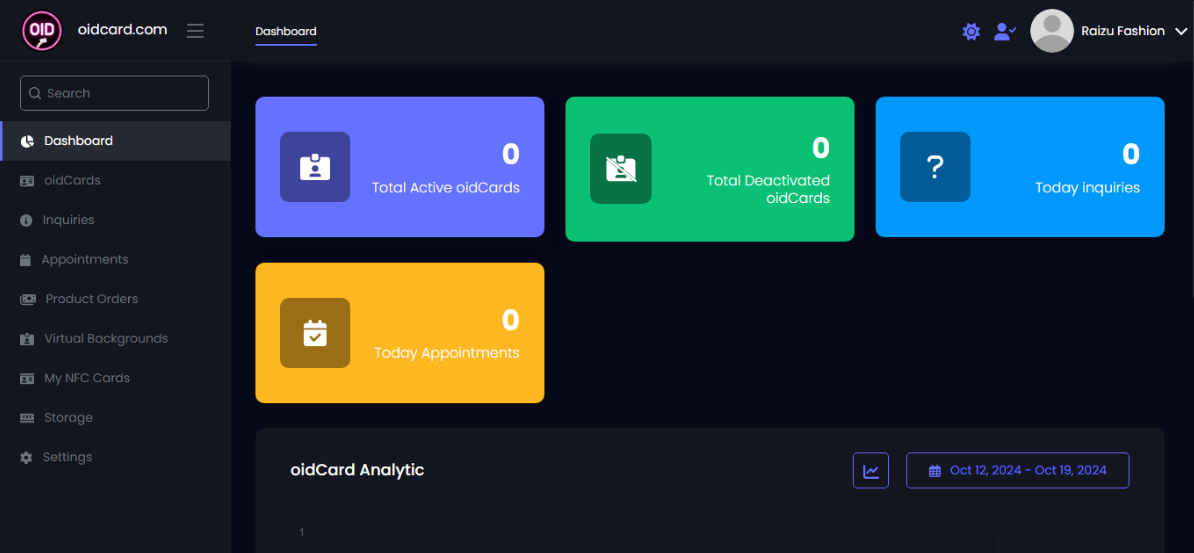
Step 3: To set up your profile, click on your profile icon. You will find five options:
- Account Settings
- Manage Subscription
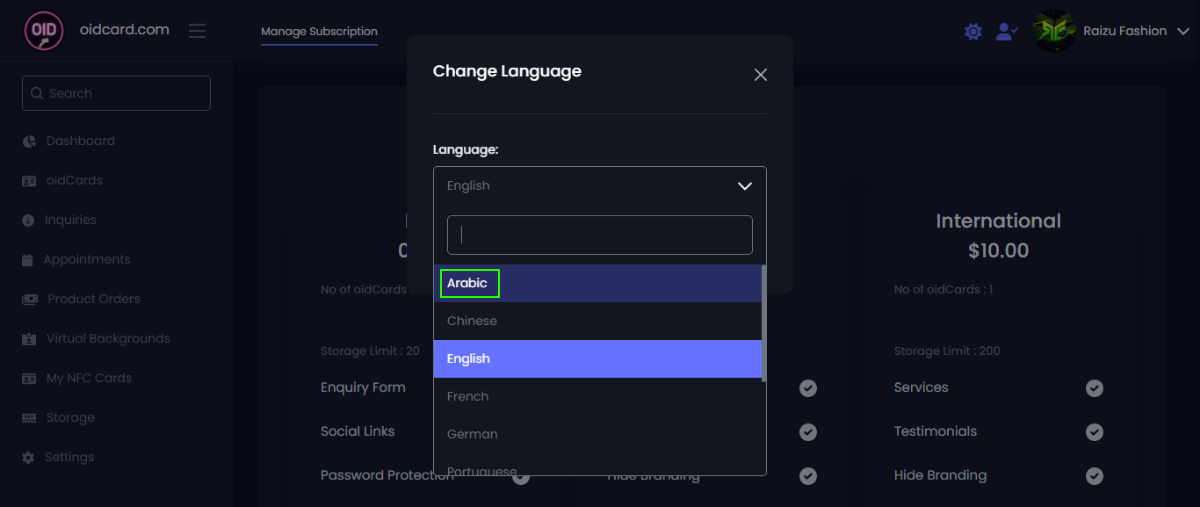
- Change Language
- Delete My Account
- Sign Out
We will explain each of these in detail.
1. Account Settings
After clicking the profile icon, select “Account Settings.”
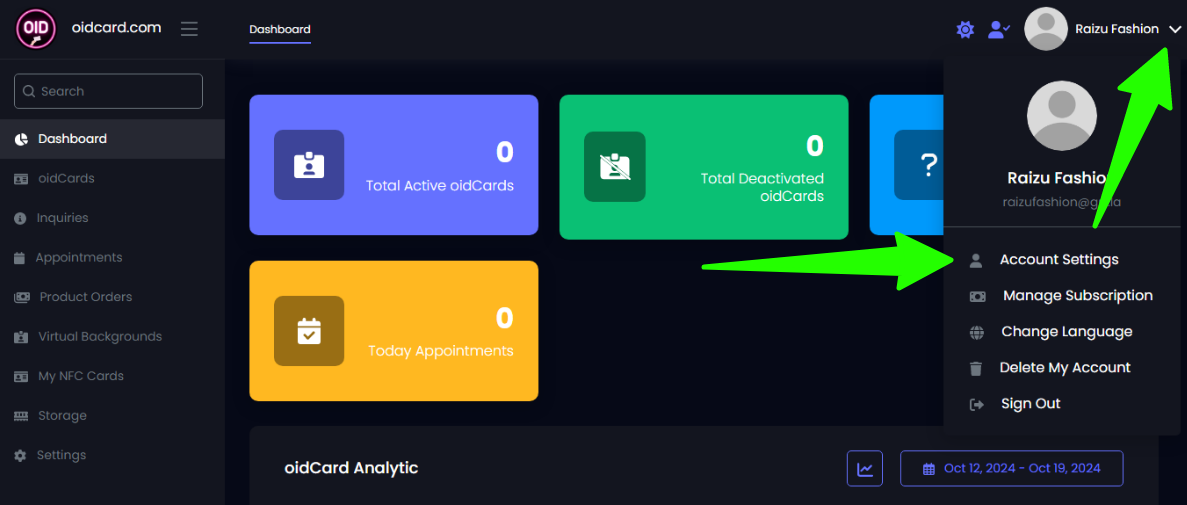
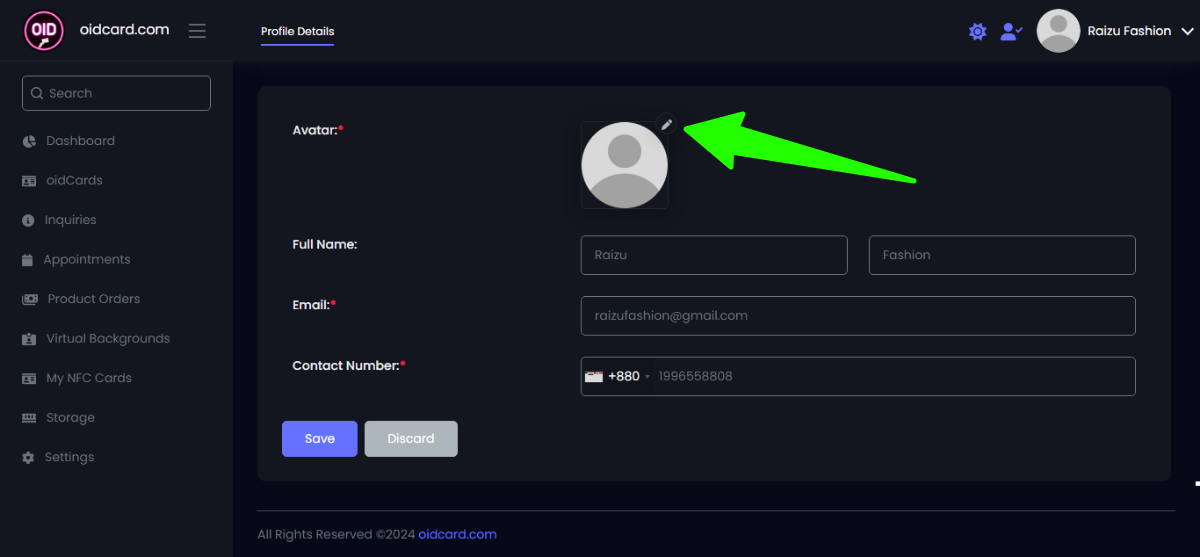
Step 4: In Account Settings, you will find four options:
- Avatar: Here, you can change your profile picture.
- Full Name: You can change the name associated with your account.
- Email: You can change the email address linked to your account.
- Contact Number: You can update your mobile number.
Note: This information pertains to your account (not your oidCard or website details). We will cover how to provide information for your oidCard in a future guide.
To set your profile picture, click the “Avatar” icon.
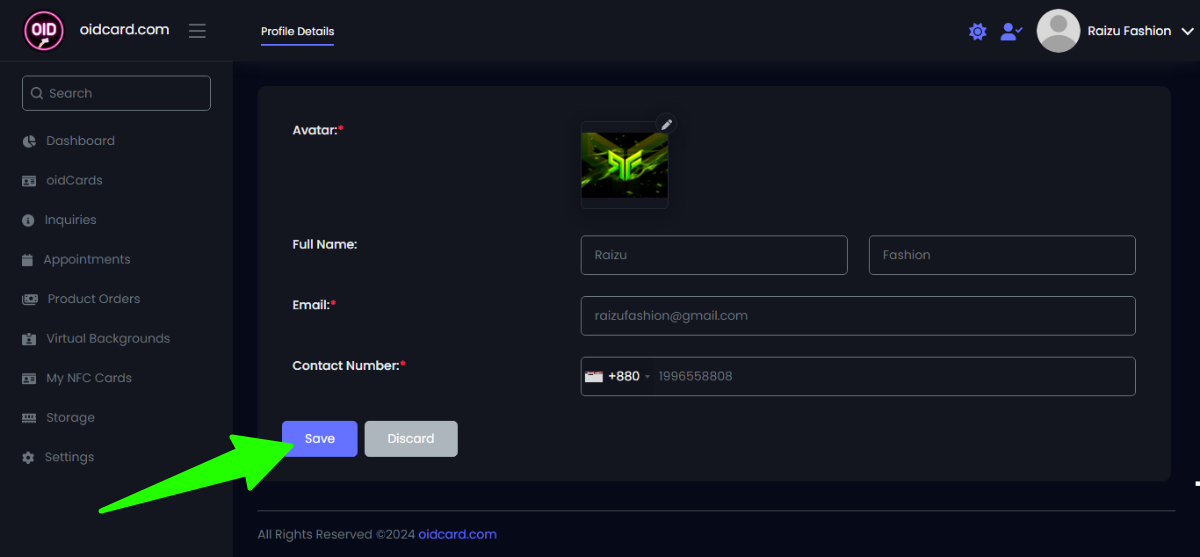
Step 5: Select your company logo or a personal picture using your computer or mobile. Then click “Save.”
Congratulations! You will see that your account’s profile picture has been changed.
2. Manage Subscription
The Manage Subscription option allows you to check whether your account is free or premium.
Step 6: Click on “Manage Subscription” from your profile icon.
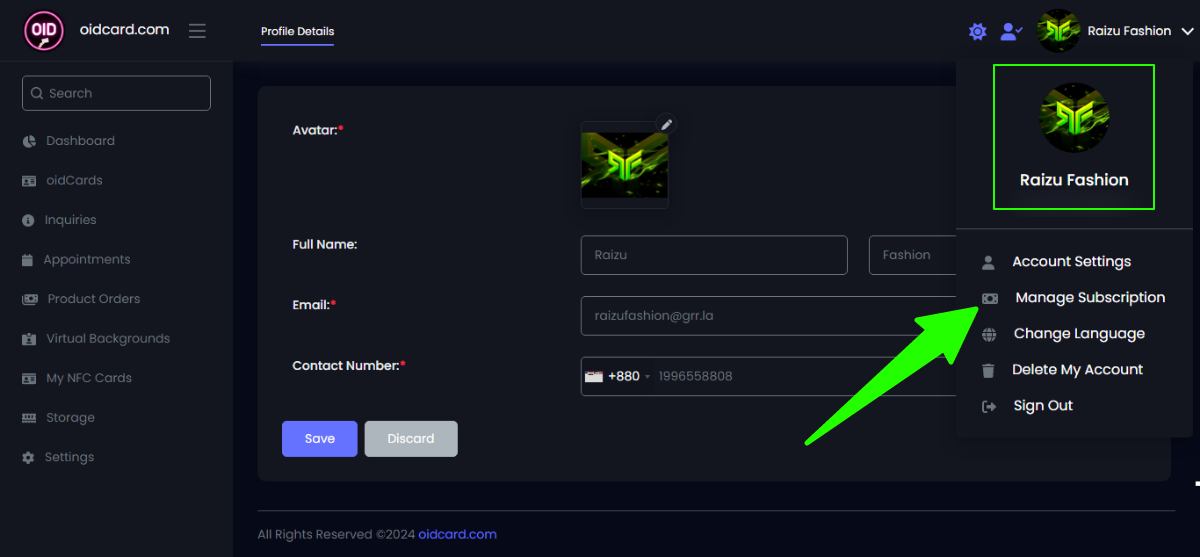
Step 7: Here, you can see the full details of your account. For example, the “Raizu Fashion” account is active and does not require any payment.
You will also see what features are available with a free account. If you wish, you can upgrade your free account to a premium account based on your needs.
By upgrading, you will gain access to additional features that we have already explained in the oidCard guide. You can click on “Upgrade Plan.”
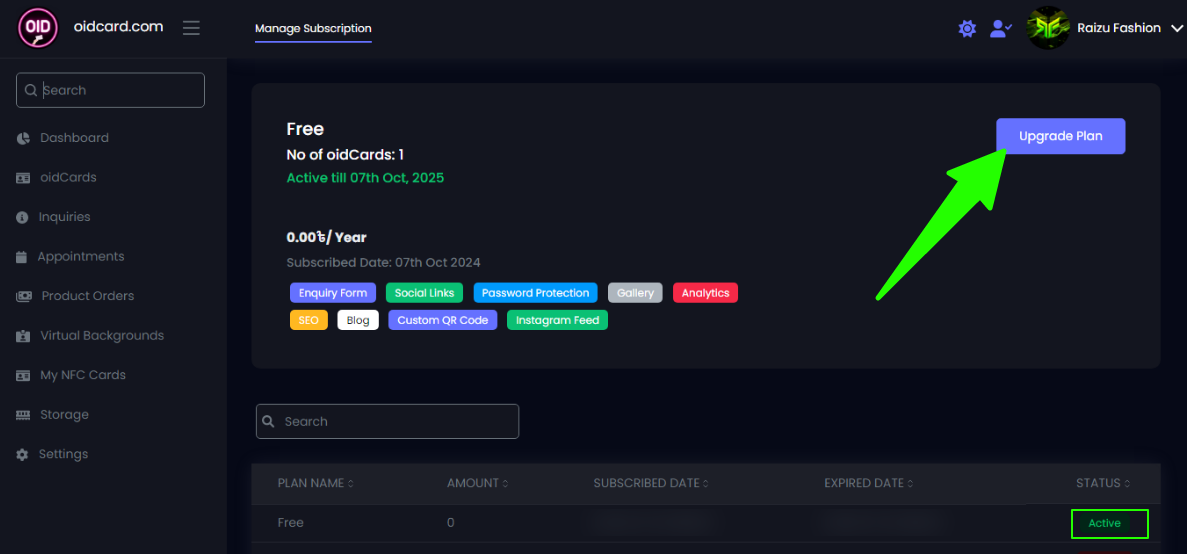
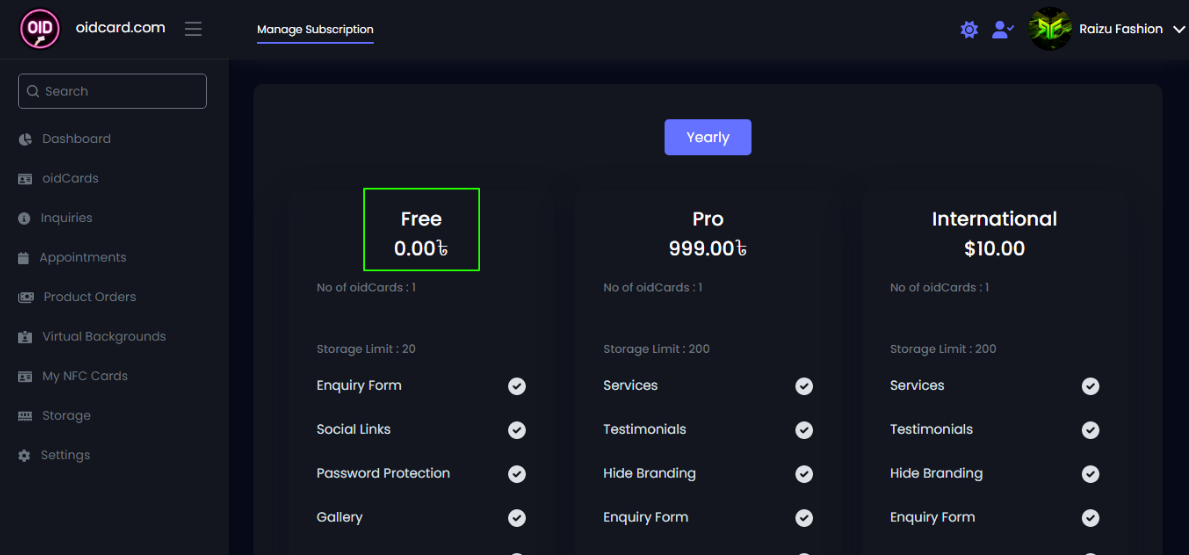
After clicking, you will see that your free account is active. You can also view the features available with free, premium, or international accounts.
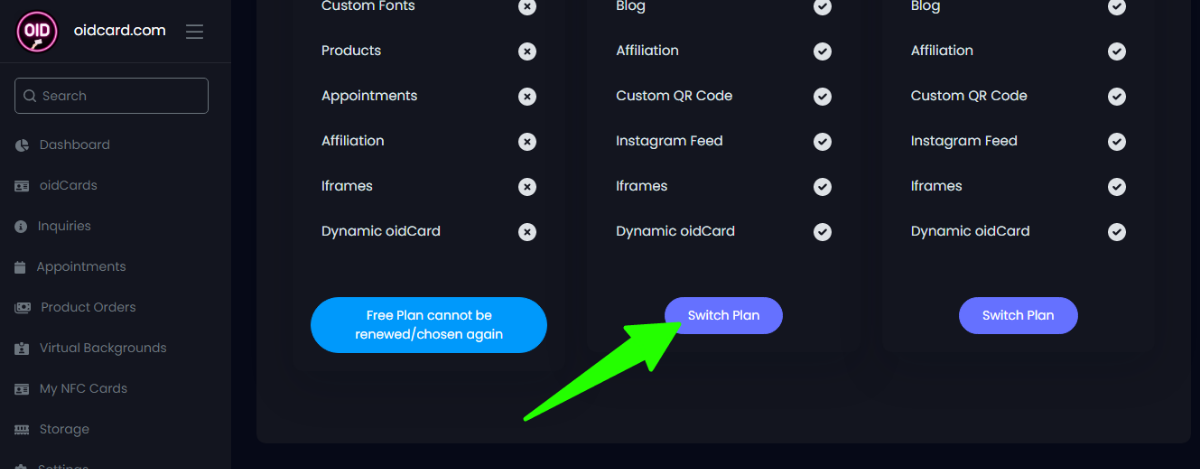
Step 8: Scroll down and click the “Switch Plan” button to convert from a free to a premium account.
3. Change Language
In this section, you can change the language of your dashboard. Currently, there are about 10 languages available, with English as the default.
- Arabic
- Chinese
- English
- French
- German
- Portuguese
- Russian
- Spanish
- Turkish
- Italian
You can set the language of your choice. We will add more languages in the future for your convenience.
For example, if you’re from Saudi Arabia and find the English dashboard less comfortable, you can convert it to Arabic.
Step 9: Click on “Change Language” from your profile icon.
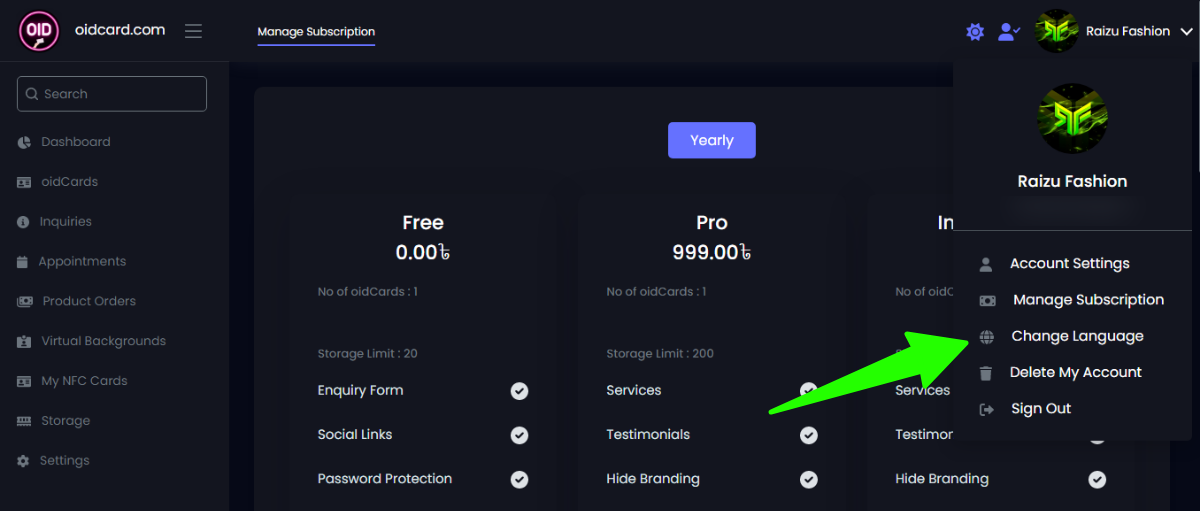
Step 10: You will see a language selection pop-up. Choose Arabic from the options.
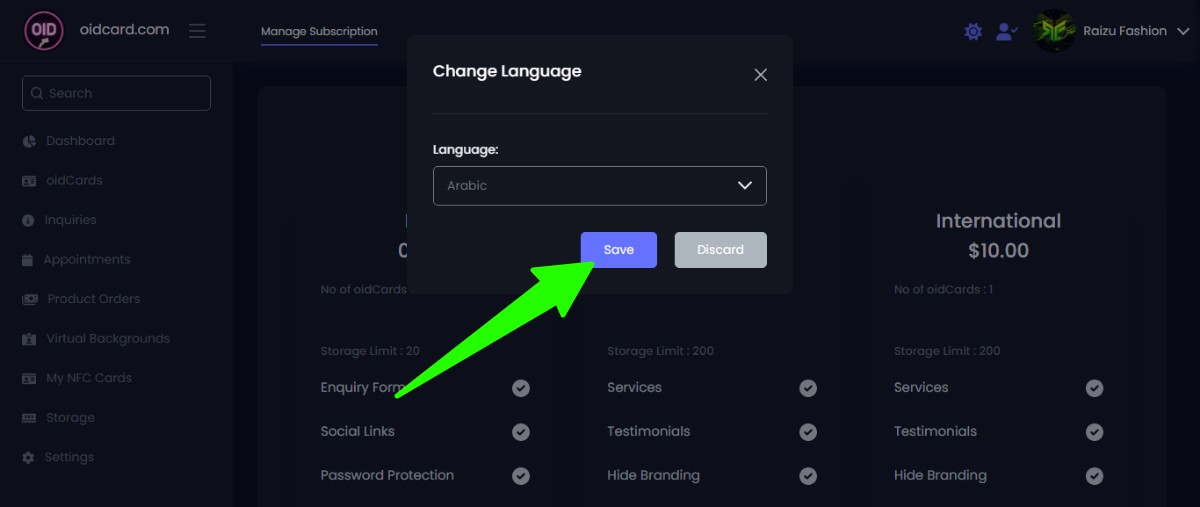
Step 11: After selecting your preferred language, click “Save.”
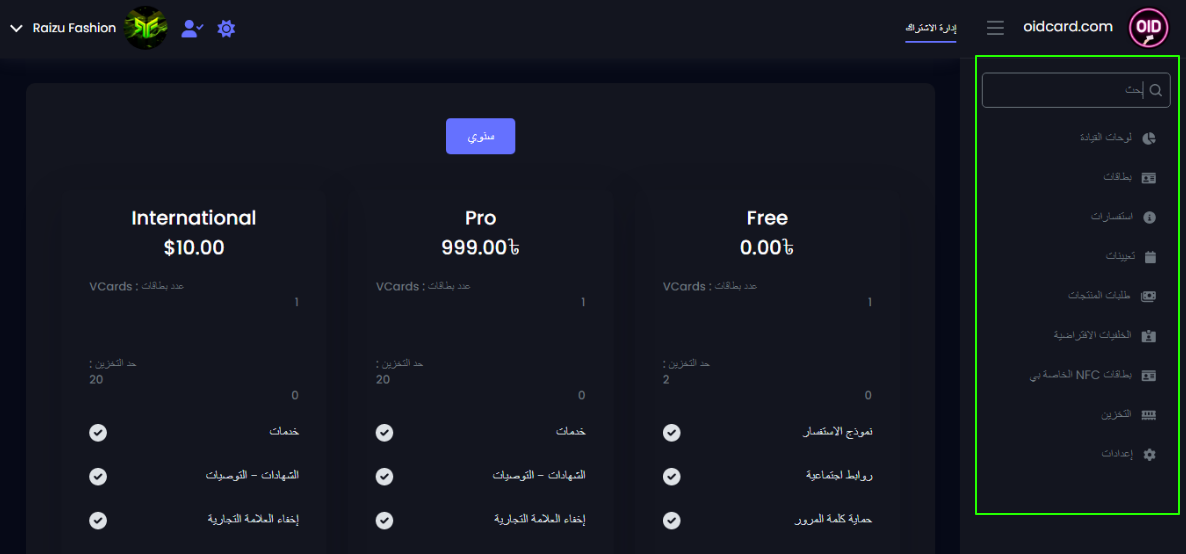
You will notice that everything has changed to Arabic. Since Arabic is a right-to-left (RTL) language, the layout will adjust accordingly.
If your language changes due to any mistake, you can follow these steps to switch back to English.
4. Delete My Account
If at any point you decide you no longer want your oidCard account, you can delete it.
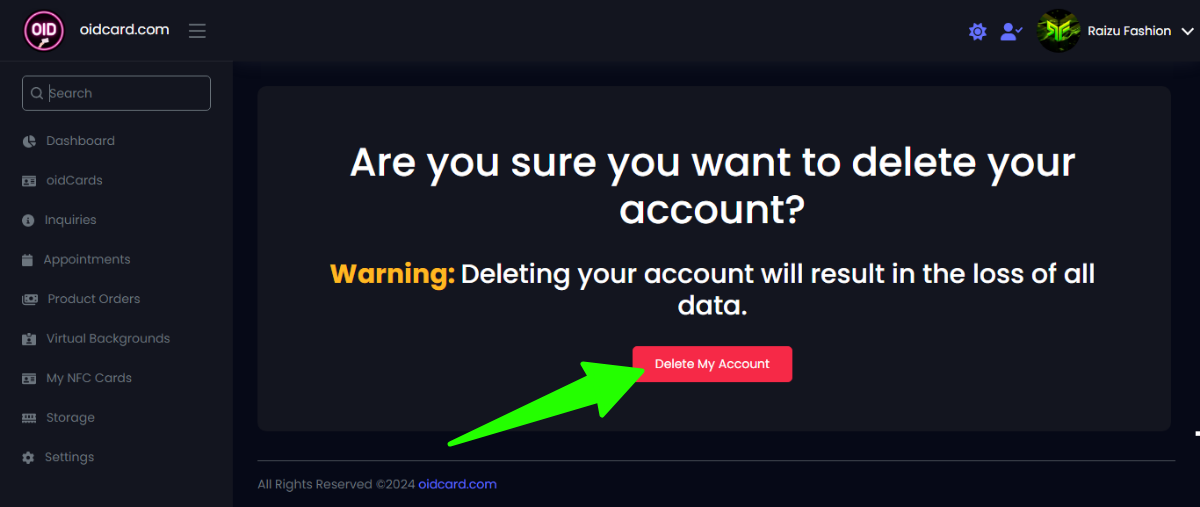
Step 12: To delete your account, go to your profile icon and click on “Delete My Account.”
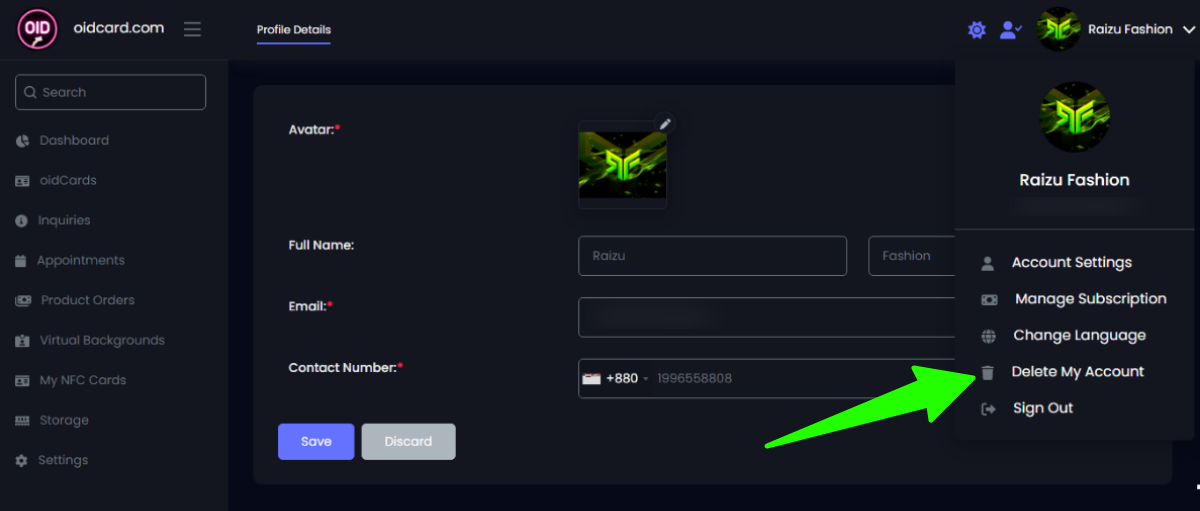
Step 13: You will see a confirmation warning stating that “You will lose the data you have provided to oidCard.”
This means:
- You won’t be able to sign up again with the same email.
- You will lose the username you created (which is used for your oidCard website, e.g., oidcard/raizufashion).
So, if you delete your account and later change your mind, you won’t be able to recover it.
5. Sign Out
Signing out means logging out from the device you used to log in.
For instance, if you log in on a friend’s mobile and forget to sign out, they could access your account until you do.
If you don’t check “Remember Me” during login, you will be automatically signed out after a session.
Step 14: To sign out, click on your profile icon and select “Sign Out.”
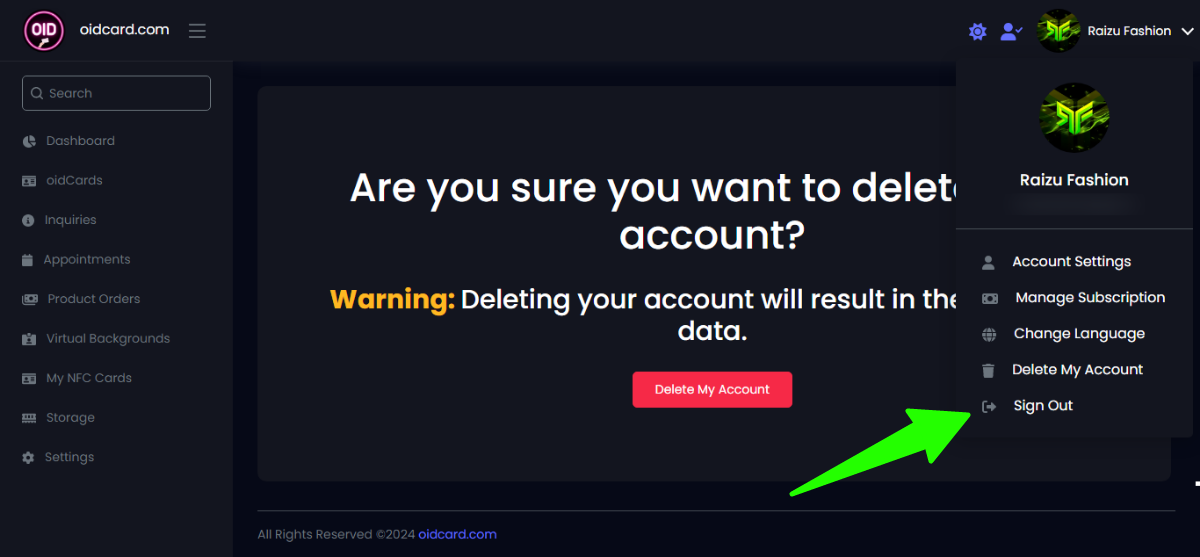
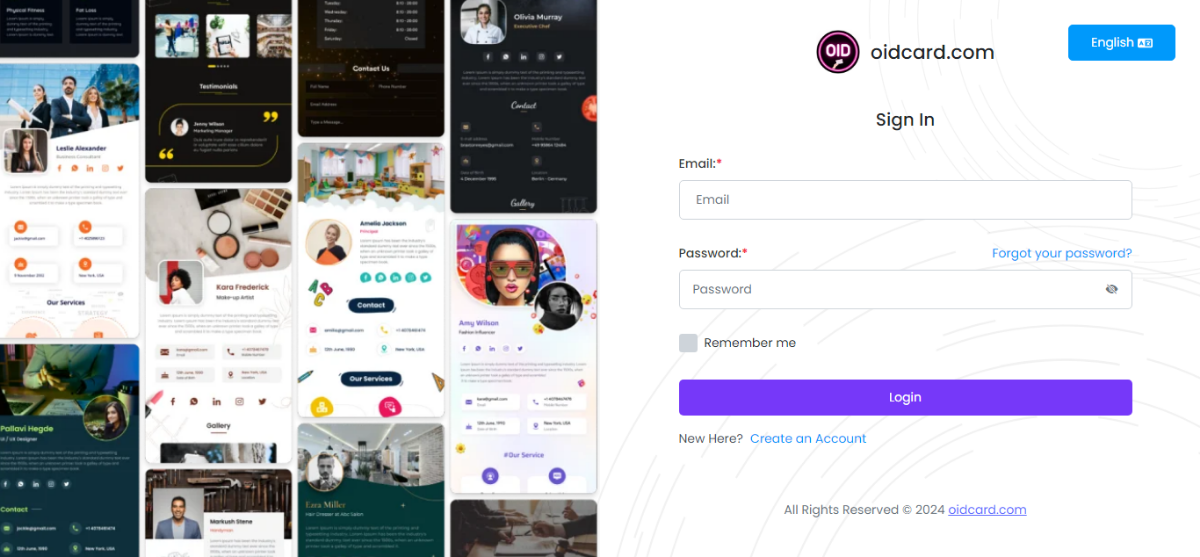
After clicking “Sign Out,” you will see that you have successfully logged out, and you can log in again to access your account or dashboard.
Conclusion
By following this guide, you can easily set up your profile and manage your account settings. You can also change your account information as needed.
If you have any questions about this guide, please let us know in the comments. We welcome your thoughts and feedback to improve our services.
Thank you!
